
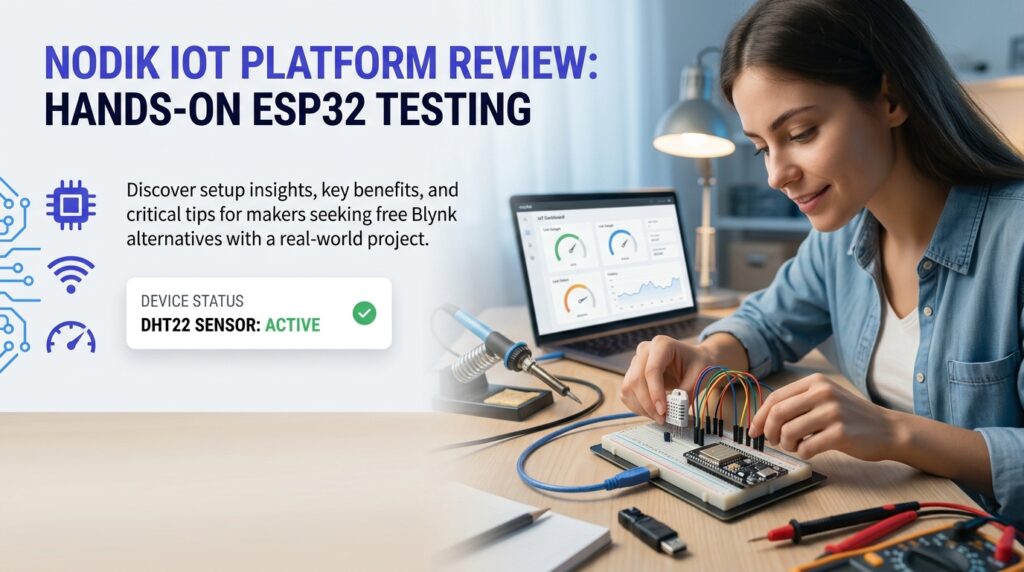
This nodik IoT platform review is based on hands-on testing on the live nodik.in dashboard, connecting an ESP32 DevKit V1 and an ESP8266 NodeMCU 1.0 over a three-week period. I ran temperature and humidity sensors and a relay control circuit, all on the free tier — 4 devices, no card required. No sponsored access, no preview builds. What follows is an honest, experience-driven account of what works, what frustrates, and whether Nodik deserves a place in your maker toolkit as a Blynk alternative.
Nodik IoT Platform Review: What It Is and Why It Matters
Definition and Background
Nodik is a cloud-based IoT dashboard platform aimed squarely at hobbyists, students, and small-scale makers. Unlike enterprise-oriented services, it focuses on a visual drag-and-drop dashboard and device management without requiring a credit card for basic functionality. The platform sits in the same category as Node-RED, Thingsboard Community, and Adafruit IO — services that let you pipe sensor data from a microcontroller to a browser-visible dashboard — but takes a genuinely different technical approach: there is no MQTT broker and no client library to configure. Devices talk to Nodik over plain HTTPS, which is a real point of difference worth understanding before you start. Various industry forecasts, including Statista’s IoT connections tracking, put the number of connected IoT devices worldwide in the tens of billions by the end of this decade, and platforms like Nodik exist precisely to give individual makers a manageable slice of that connected infrastructure without enterprise pricing or enterprise complexity.
Why It Matters
The core appeal is simple: Blynk’s free tier now caps you at a handful of datastreams and limits certain widget types behind a paywall. Students building university projects or hobbyists running weekend experiments hit those walls fast. The nodik IoT platform review community on Reddit and various ESP32 forums repeatedly surfaces Nodik as a candidate worth testing. Having gone through that process systematically, I can confirm it addresses a specific pain point well — you get a working dashboard without adopting a new protocol or library, since there’s no MQTT broker to configure at all. If you have already looked at our guide on Blynk free plan limits and how to escape them, Nodik will feel like a natural next step to evaluate.
What Stood Out After Three Weeks of Testing
Primary Advantages
After three weeks of hands-on use, these were the standout strengths observed in the nodik IoT platform review process:
- No MQTT broker, no client library: Nodik uses a plain HTTPS request/response protocol instead of MQTT. Your device authenticates once at boot, then sends readings and checks for commands over regular HTTPS calls — there’s no PubSubClient-style dependency to add or broker credentials to manage.
- Field names are the whole contract: Send
{"temp":27.5}from your device and a dashboard widget configured with fieldtemppicks it up automatically. There’s no separate pin registration or topic namespace to get right — just make sure the field name in your firmware matches the field name in the widget. - Bidirectional control: The platform supports both telemetry (sensor readings going up) and commands (dashboard actions going back down to the device), which is essential for relay and switch-control projects. One-shot commands reset themselves once the device has acted on them, so you don’t have to clear them manually.
- Built-in anomaly detection: Once a field has accumulated roughly 100 data points, Nodik starts flagging statistical outliers (values more than 4 standard deviations from the recent baseline) automatically, with a 30-minute cooldown per field so you’re not spammed with repeat alerts. This is a genuinely useful feature that most free-tier competitors don’t offer at all — you can disable it per device if you’d rather set your own fixed thresholds.
- Data history and charts: Historical data visualization is available on the free tier, letting you plot sensor trends over time directly on a chart widget.
Who Benefits Most
This nodik IoT platform review finds the platform most valuable for three groups. First, engineering and computer science students who need a reliable dashboard to demonstrate a semester project without incurring costs. Second, self-taught makers who are comfortable flashing an Arduino sketch and reading basic JSON but would rather not learn MQTT or configure a full self-hosted stack like Home Assistant or Grafana. Third, budget-conscious hobbyists who have already been frustrated by Blynk’s paywalls and want a migration path that preserves their existing ESP32 firmware logic with minimal rewriting.
How to Get Started with Nodik
Step-by-Step Overview
Getting an ESP32 connected through the nodik dashboard follows a clear sequence. Here is the path that worked cleanly in testing:
- Step 1 — Register and provision a device: Sign up with an email address. No credit card is required, and the free plan covers 4 devices. Provisioning a device from the dashboard generates a device ID and a one-time token — copy the token into your firmware immediately, since it’s only shown once.
- Step 2 — Flash your ESP32 or ESP8266: Start from Nodik’s example firmware sketch rather than a generic MQTT example — no external pub/sub library is needed. Set your Wi-Fi credentials, device ID, and token in the sketch.
- Step 3 — Let the device authenticate on boot: On startup, the device posts its ID and token to Nodik’s auth endpoint and receives an access token good for about an hour. The example firmware re-authenticates roughly five minutes before that hour is up, so it never actually runs on an expired token.
- Step 4 — Publish telemetry and poll for commands: The firmware attempts telemetry every 5 seconds by default, but self-paces to whatever rate your plan actually allows — on the free tier that settled to about every 15 seconds once authenticated, matching the plan’s advertised refresh rate. Command polling runs on a fixed roughly-2-second cycle regardless of plan. Both intervals are baked into the protocol, not something you configure via a broker.
- Step 5 — Build your dashboard: Back in the browser, drag widgets (gauge, chart, switch, slider, map) onto the canvas and map each one to the exact field name your device sends. Data should appear live within seconds. This is the step most Blynk migrants care about most, and it worked reliably in testing — the dashboard flags a device offline if nothing arrives for about 15 seconds, which is a useful sanity check while you’re debugging.
Tools and Resources You Need
You will need an ESP32 DevKit or ESP8266 NodeMCU board, a USB cable, and Arduino IDE 2.x. A DHT11 or DHT22 sensor is useful for a first real-world test. Because there’s no MQTT layer, you won’t need a pub/sub client library or a separate MQTT debugging tool — a plain curl command against the device’s telemetry endpoint is enough to test the platform side before your firmware is even ready. No paid tools are required at any stage of a basic Nodik setup.
Common Mistakes to Avoid
Mistake #1: Field Name Mismatch
The most common error encountered during this nodik IoT platform review was a mismatch between the field name sent by the firmware and the field name configured on the widget. Since the field name is the entire contract — there’s no separate registration step — a typo like temperature in your sketch against a widget configured for temp means the widget will never update, even though the device is authenticating and sending data successfully. Nothing errors; the value just silently goes nowhere the dashboard is looking.
Mistake #2: Not Handling Token Expiry
The access token is good for about an hour, not indefinitely, so a sketch that authenticates once at boot and never re-checks will start silently failing its telemetry and command calls once that hour is up. Building token refresh into the main loop — checking elapsed time since the last auth call, rather than waiting for a request to fail — solved this cleanly and is worth doing from the start rather than debugging it later.
How to Prevent Them
Always copy field names directly from the widget editor rather than retyping them by hand. Test your telemetry payload with a plain curl PATCH request before assuming the firmware is at fault — if the value shows up on the dashboard from a manual curl call but not from your device, the problem is in the sketch, not the platform. For the token-expiry issue, build the refresh check into your main loop rather than reacting to failed calls after the fact. If you are coming from Blynk, our post on how to migrate from Blynk to a free IoT platform covers the mindset shift from Blynk’s virtual pin model to Nodik’s named-field model, which directly helps avoid these early mistakes.
Tips for Getting the Best Results
Pro Tips
These practical observations come directly from the nodik IoT platform review testing period and go beyond the basic setup documentation:
- Batch your readings into one payload: Instead of sending separate calls for each sensor value, pack multiple readings (temperature, humidity, signal strength) into a single JSON body in one telemetry update. It’s fewer HTTPS calls, which matters for battery-powered devices.
- Let the built-in anomaly detection do the work: Rather than hand-rolling your own threshold-alert logic, give a field time to accumulate a baseline (around 100 readings) and let Nodik’s anomaly detection flag genuine outliers. If a field is naturally noisy and you’d rather set fixed thresholds yourself, you can disable smart alerts per device.
- Name your fields descriptively: Once you have multiple devices, generic names like
tempbecome confusing across dashboards. Use something likebedroomTempfrom the start — there’s no enforced hierarchy, so consistency is entirely on you. - Test with curl before touching your ESP32: If a widget is not updating, authenticate and push a test value with curl to the same field. If the dashboard updates, the problem is in your firmware. If it doesn’t, the problem is in your widget’s field mapping. This two-step isolation saves significant debugging time.
Advanced Techniques
For makers ready to push further, Nodik handles a real production workload today, not just toy projects — the platform runs a genuine dual-pump borewell controller in the field, tracking fields like water level, flow rate, and pump state, with scheduling and dry-run protection built into the device firmware itself rather than the cloud. That’s a deliberate safety choice worth copying in your own projects: treat Nodik as a monitoring and command layer, and keep your hardware fail-safes (like a dry-run cutoff or manual override) running locally on the device, not dependent on a cloud round-trip. For battery-powered sensors, pairing a deep-sleep cycle with Nodik’s HTTPS protocol works well: wake, re-authenticate if your token has expired, publish a batched reading, and sleep again — just expect the dashboard to show the device as briefly “offline” between wake cycles, since anything longer than about 15 seconds without a telemetry update triggers that status.
Frequently Asked Questions About Nodik IoT Platform Review
Is Nodik genuinely free, or does it have hidden costs?
Based on this nodik IoT platform review, the free tier is functional without requiring payment — 4 devices, no card. Paid plans exist: Maker (12 devices at an 8-second refresh, plus a daily quota of Ask Nodik AI questions) and Creator (16 devices at a 4-second refresh, plus both Ask Nodik AI and the AI firmware generator), both billed monthly or annually with two months free on the annual cycle. There’s no blanket money-back guarantee to report here — Nodik’s actual refund policy is narrower: if a renewal charge was unintended, you have 14 days to request a refund, provided the new billing period hasn’t been substantially used. A single ESP32 project runs fully on the free tier.
Does Nodik work with ESP8266 as well as ESP32?
Yes. The testing for this review included an ESP8266 NodeMCU 1.0. Connection behavior was identical to the ESP32, since the platform’s HTTPS protocol doesn’t depend on any board-specific client library — anything that can make an HTTPS request and parse JSON can talk to Nodik.
How does Nodik compare to Adafruit IO or Thingsboard?
Adafruit IO has a polished UI and a strong community, and Thingsboard Community requires self-hosting, which adds infrastructure complexity. Nodik sits between the two: cloud-hosted like Adafruit IO, but built around a plain HTTPS protocol rather than MQTT, so there’s no broker or client library to configure. To be fair to the alternatives, Nodik doesn’t have a native App Store or Play Store app — though it does install as a home-screen PWA that behaves like one on both phone and desktop. It also doesn’t offer built-in cloud OTA firmware updates the way Blynk does; you’ll need your own OTA setup (the ArduinoOTA library over your local network works fine) if you want to push firmware without a USB cable. For a broader comparison across platforms, our best free IoT dashboard tools for ESP32 guide covers several alternatives side by side.
What is the verdict — is Nodik worth using?
The platform delivers reliably on its core promise: get an ESP32 or ESP8266 publishing to a cloud dashboard in well under 15 minutes, for free, without touching MQTT. Skipping the broker and client-library setup that most competing platforms require is a genuine, practical advantage for beginners, and the built-in anomaly detection is a nice touch most free tiers don’t bother with. It’s also proven outside the lab — we run a real borewell pump controller on this platform, not just demo sensors. The honest gaps are no native App Store/Play Store app (the PWA covers a lot of that ground, but it’s not the same thing), no built-in cloud OTA the way Blynk offers, and a smaller community and thinner documentation than Adafruit IO. For anyone who has hit Blynk’s paywalls and wants a code-friendly alternative without spinning up their own server or learning a new protocol, Nodik earns its place on the shortlist.
More in this series
- Blynk Free Plan Limits and How to Escape Them: Your Practical Guide
- Is Blynk Still Worth It in 2026? The Honest Guide for Makers
- How to Migrate from Blynk to a Free IoT Platform: Step-by-Step Guide
- Blynk vs Nodik: Which IoT Platform Is Better for ESP32 Makers? (2026)
- Best Blynk Alternatives Free and Paid: Top Picks for ESP32 Makers (2026)
Get new posts by email
Pick the topics you care about — we only email you when something new is published in them.