
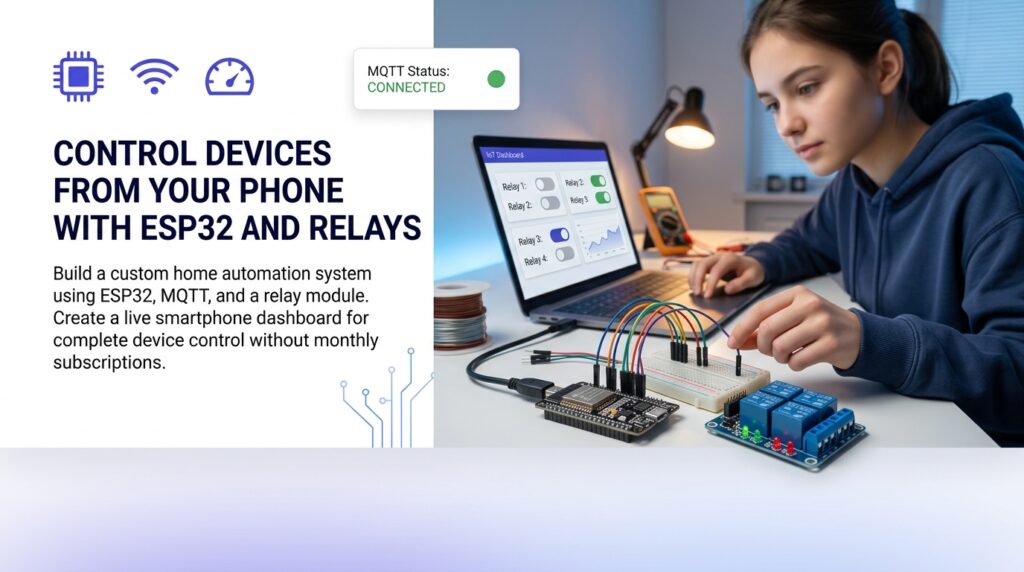
ESP32 home automation relay control from phone is one of the most practical projects a maker can build — you end up with a real, working system that switches lights, fans, or appliances from anywhere on your network. This guide walks you through every stage, from wiring a relay module to sending MQTT commands from a mobile dashboard, using entirely free tools.
What Is ESP32 Home Automation Relay Control From Phone
Definition and Background
At its core, ESP32 home automation relay control from phone means using an ESP32 microcontroller as a Wi-Fi bridge between your smartphone and a relay switch that opens or closes a mains-voltage circuit. The ESP32 connects to your home router, subscribes to an MQTT topic, and toggles a GPIO pin whenever it receives a command from your phone. That GPIO pin drives a relay coil, which physically switches a connected device on or off. The ESP32 microcontroller was introduced by Espressif Systems in 2016 and has become a go-to chip for IoT projects because it packs dual-core processing, Wi-Fi, and Bluetooth into a module that costs under five dollars.
Recent community projects show just how scalable this approach is. Makers on Hackster.io have demonstrated direct ESP32-to-phone automation systems that bypass cloud subscriptions entirely, while the ESP32-S3 variant has been used to control as many as 16 relays in a single enclosure. Even a modest 2-channel or 4-channel relay board gives you enough switching capacity to automate the most common household loads.
Why It Matters
Subscription-gated platforms have pushed many hobbyists to look for alternatives. Cost is a recurring theme in maker-community discussion around Hackster.io project writeups and forums, where subscription-gated dashboards are a frequent reason builders abandon a platform mid-project. Building ESP32 relay control from your phone with open-source tools removes that barrier completely. You own the firmware, the broker, and the dashboard — nothing breaks when a vendor changes a pricing tier.
Why Build This on an Open Stack
Primary Advantages
Building ESP32 home automation relay control from phone on an open stack gives you several concrete advantages over proprietary systems.
- Zero recurring cost. A free MQTT broker like Mosquitto running on a Raspberry Pi or a free-tier cloud broker such as HiveMQ Cloud handles all message routing.
- Local control fallback. Because the ESP32 communicates over your LAN, relay switching still works when your internet connection drops — a critical advantage over purely cloud-dependent systems.
- Multi-relay scalability. The same firmware pattern scales from a single relay module to an 8-channel board without restructuring your code.
- Platform flexibility. You can surface controls in Home Assistant, Node-RED, or a mobile dashboard app without rewriting the ESP32 side.
Who Benefits Most
Engineering students looking for a capstone project, self-taught makers who want real-world switching control, and budget-conscious homeowners who are not ready to invest in commercial smart-home hubs all gain the most from an ESP32-based relay setup. If you have already read through our ESP32 IoT Project Checklist Before Submission, you already know that documenting your hardware choices and firmware version before deployment saves hours of debugging later — the same discipline applies here.
How to Get Started: Tools and Setup
Tools and Resources You Need
- ESP32 development board (e.g., ESP32 DevKit V1 or ESP32-C3 mini)
- 1-channel, 4-channel, or 8-channel 5V relay module
- Jumper wires, USB cable, 5V power supply
- Arduino IDE with the ESP32 board package installed
- PubSubClient library (MQTT) installed via the Arduino Library Manager
- An MQTT broker — Mosquitto locally or HiveMQ Cloud free tier
- A mobile MQTT client app such as MQTT Dash (Android) or a full dashboard like Nodik
Step-by-Step Overview
Step 1: Wire the Relay Module to Your ESP32
Connect the relay module’s VCC pin to the ESP32’s 5V (VIN) rail and GND to GND. Connect the relay’s IN1 signal pin to GPIO 26 on your ESP32. If you are using a 4-channel board, map IN1–IN4 to GPIOs 26, 27, 14, and 12 respectively. Most relay modules are active-LOW, meaning the relay energises when you write LOW to the GPIO — confirm this in your module’s datasheet before powering up.
Step 2: Install the Arduino IDE and Board Package
Open Arduino IDE, go to File → Preferences, and paste https://raw.githubusercontent.com/espressif/arduino-esp32/gh-pages/package_esp32_index.json into the Additional Boards Manager URLs field. Open Tools → Board → Boards Manager, search for “esp32”, and install the Espressif package. Select ESP32 Dev Module (or your specific variant) from the board list.
Step 3: Install the PubSubClient Library
Go to Sketch → Include Library → Manage Libraries. Search for PubSubClient by Nick O’Leary and install the latest version. This library handles all MQTT subscribe and publish operations and is the backbone of ESP32 home automation relay control from phone over Wi-Fi.
Step 4: Flash the Relay Control Firmware
Create a new sketch and paste the following code. Replace the placeholder values with your own credentials.
#include <WiFi.h>
#include <PubSubClient.h>
const char* ssid = “YOUR_SSID”;
const char* password = “YOUR_WIFI_PASSWORD”;
const char* mqtt_server = “broker.hivemq.com”;
const int RELAY_PIN = 26;
WiFiClient espClient;
PubSubClient client(espClient);
void callback(char* topic, byte* payload, unsigned int length) {
String msg = “”;
for (int i = 0; i < length; i++) msg += (char)payload[i];
if (msg == “ON”) digitalWrite(RELAY_PIN, LOW);
if (msg == “OFF”) digitalWrite(RELAY_PIN, HIGH);
}
void setup() {
pinMode(RELAY_PIN, OUTPUT);
digitalWrite(RELAY_PIN, HIGH); // relay off at boot
WiFi.begin(ssid, password);
while (WiFi.status() != WL_CONNECTED) delay(500);
client.setServer(mqtt_server, 1883);
client.setCallback(callback);
}
void loop() {
if (!client.connected()) {
client.connect(“ESP32RelayClient”);
client.subscribe(“home/relay1”);
}
client.loop();
}
Upload this sketch to your board. Open the Serial Monitor at 115200 baud and confirm you see a successful Wi-Fi connection and MQTT broker handshake before moving on to the next step.
Step 5: Configure Your Mobile MQTT Dashboard
Install MQTT Dash on Android or use any MQTT-compatible dashboard app. Create a new broker connection pointing to broker.hivemq.com on port 1883. Add a button widget and set its publish topic to home/relay1, with ON payload ON and OFF payload OFF. Tap the button — your relay should click audibly and the connected device should switch. This confirms your ESP32 home automation relay control from phone pipeline is fully operational.
If you want a richer visual dashboard rather than a bare MQTT client, Nodik provides pre-built mobile widgets for relay toggle buttons, status indicators, and scheduling without writing any front-end code.
Step 6: Test Safety Before Connecting Mains Voltage
Before wiring any 120V or 240V load, verify relay switching with a 5V LED or a low-voltage DC load. Confirm the relay energises and de-energises correctly for every MQTT command. Only after a full low-voltage verification should you connect mains-voltage wiring, and always follow your local electrical code. For anything wired into fixed household circuits rather than a plug-in adapter, have a qualified electrician review or perform the mains-side work.
Step 7: Expand to Multiple Relays
Duplicate the callback logic to handle additional topics such as home/relay2 and home/relay3, each mapped to a different GPIO pin. Add matching subscribe calls inside the reconnect block. Your mobile dashboard simply gets additional button widgets, one per relay. This pattern scales directly to 8-channel boards used in room-wide lighting control projects — the firmware structure stays identical.
Common Mistakes to Avoid
Mistake #1: Powering the Relay Module From the ESP32’s 3.3V Pin
Most relay modules require 5V to energise the coil reliably. Feeding them 3.3V from the ESP32’s onboard regulator causes intermittent switching or no switching at all. Always power the relay VCC from the 5V (VIN) rail or an external 5V supply, and use a logic-level transistor or an optocoupler module if your relay board does not include one. This single wiring error accounts for the majority of “my relay won’t turn on” forum posts about ESP32 home automation relay control from phone builds.
Mistake #2: Skipping MQTT Reconnect Logic
A public MQTT broker will drop idle connections after a timeout period. If your loop() function does not check client.connected() and reconnect automatically, your ESP32 silently stops receiving commands — often hours after initial deployment. Always wrap your subscribe call in a reconnect check, exactly as shown in the firmware above.
How to Prevent Them
Add a Serial.println inside the reconnect block so you can monitor disconnection events during testing. Set the MQTT keepalive interval to 60 seconds with client.setKeepAlive(60). For production deployments of ESP32 home automation relay control from phone, consider running your own Mosquitto broker on a local Raspberry Pi — this eliminates public broker timeouts and latency spikes entirely. Our Best Blynk Alternatives guide covers broker options in detail if you want to compare local versus cloud approaches.
Tips for Getting the Best Results
Pro Tips
- Use retained MQTT messages. Publish with the
retainflag set totrueso the broker replays the last relay state to your ESP32 every time it reconnects. This prevents relays from defaulting to an unknown state after a power cycle. - Add a physical override button. Wire a momentary push button to a GPIO and debounce it in firmware. This gives you local control if your phone or network is unavailable — a non-negotiable feature for lights and fans.
- Separate relay and ESP32 ground planes. On noisy relay boards, switching transients can reset the ESP32. Add a 100nF ceramic capacitor across the relay coil and a 10µF bulk capacitor on the ESP32 power rail.
- Label your MQTT topics consistently. Use a hierarchy like
home/room/device(e.g.,home/bedroom/fan) from day one. Retrofitting topic structure onto a working system is painful.
Advanced Techniques
Once your basic ESP32 home automation relay control from phone setup is stable, add scheduling by publishing timed MQTT commands from a Node-RED flow or a Home Assistant automation. Node-RED’s inject node can fire an ON command at sunrise and an OFF command at sunset using built-in time functions — no extra hardware required. For deeper integration, flash your ESP32 with ESPHome firmware, which exposes every relay as a native Home Assistant entity and gives you a proper GUI for scheduling, grouping, and energy tracking. ESPHome is particularly useful when you move from a single relay to an 8-channel board controlling multiple rooms. Check our ESP32 Push Notifications Without Blynk guide for pairing relay events with real-time phone alerts so you know when a relay trips unexpectedly.
Frequently Asked Questions About ESP32 Home Automation Relay Control From Phone
Can I control relays from outside my home network?
Yes. Use a cloud MQTT broker like HiveMQ Cloud’s free tier, or set up port forwarding on your router to expose your local Mosquitto broker. A better long-term option is a VPN (WireGuard on a Raspberry Pi) that lets your phone reach your home broker securely without opening inbound ports.
How many relays can one ESP32 control?
A typical ESP32 dev board breaks out around 25 GPIO pins (fewer once you set aside the flash, strapping, and input-only pins). Practically, an 8-channel relay board covers most household automation needs, and the same firmware pattern handles every channel. Community projects have demonstrated 16-relay systems on a single ESP32-S3 board for whole-home control.
Does ESP32 home automation relay control from phone work without the internet?
Yes, if your MQTT broker runs on the local network (e.g., Mosquitto on a Pi). Your phone must be on the same Wi-Fi network, but no internet connection is required. This is one of the strongest arguments for local brokers in an ESP32 relay setup.
What is the safest relay module for mains voltage?
Optocoupler-isolated relay boards provide the best protection because they electrically separate the ESP32 logic circuit from the mains-voltage switching side. Look for modules labelled “optocoupler isolated” or “opto-isolated” and always use appropriately rated relay contacts (10A/250VAC is standard for most household loads).
Is Blynk a good option for relay control?
Blynk’s free plan restricts the number of datastreams and devices, which quickly becomes limiting for a multi-relay ESP32 home automation project. Alternatives with more generous free tiers give you the same phone-based control without the paywalls. Our Blynk vs Nodik comparison breaks down exactly where each platform draws the line on free features.
ESP32 home automation relay control from phone is a genuinely achievable weekend project. With under twenty dollars in hardware, free firmware tools, and a free MQTT broker, you can switch real household loads from your phone — with no subscription, no proprietary hub, and complete control over your own data. Start with one relay, verify the full pipeline works, and add channels as your confidence grows.
Ready to put this into practice? Try it free — no credit card required.
Connect your ESP32 relay project to Nodik's free IoT dashboard and start controlling devices from your phone in minutes — no subscription required.
More in this series
- Best Free IoT Dashboard Tools for ESP32 (2026 Guide)
- ESP32 Push Notifications Without Blynk: 5 Ways to Stay Free
- ESP32 IoT Project Checklist Before Submission: The Complete Guide
- ESP32 Smart Irrigation System for Agriculture: Step-by-Step Build Guide
- ESP32 DHT22 Temperature Dashboard: Build Your Own in 6 Steps
- ESP32 GPS Tracker With Live Map: Build Your Own in 7 Steps
- ESP32 Water Level Monitor With Live Dashboard: A Real-World Case Study
- ESP32 Project Ideas for Final Year Students: 10 Builds That Actually Impress (2026)
Get new posts by email
Pick the topics you care about — we only email you when something new is published in them.