
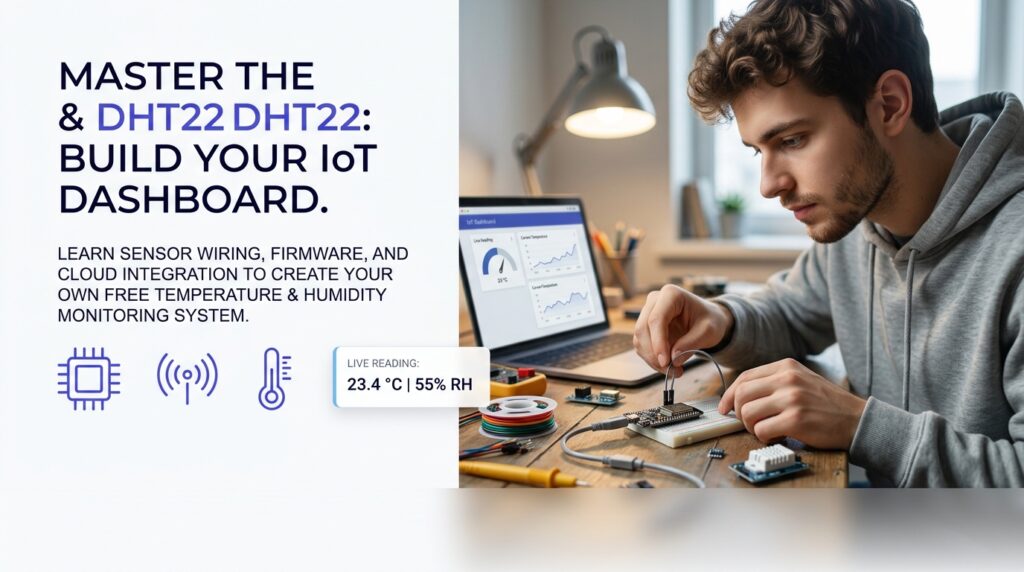
Building an esp32 dht22 temperature dashboard is one of the most practical first IoT projects a student or hobbyist can complete — it teaches sensor wiring, firmware writing, Wi-Fi connectivity, and live data visualisation in a single build. Before choosing your dashboard platform, review the best free IoT dashboard tools for ESP32 so you understand the full range of subscription-free options available to you.
The DHT22 sensor measures both temperature and humidity, and the ESP32 microcontroller handles Wi-Fi transmission natively — making the combination well-suited to budget projects. According to the Statista IoT report, the number of connected IoT devices worldwide is projected to exceed 29 billion by 2030, which explains why learning to build a live sensor dashboard now gives engineers and makers a meaningful head start. Platforms such as Nodik have emerged specifically to serve this audience with free, widget-based dashboards that work directly with ESP32 firmware — no paid tier required.
What Is an ESP32 DHT22 Temperature Dashboard
Definition and Background
An esp32 dht22 temperature dashboard is a real-time web or mobile interface that displays sensor readings — typically temperature in Celsius or Fahrenheit and relative humidity as a percentage — transmitted wirelessly from an ESP32 development board connected to a DHT22 sensor. The ESP32 reads the sensor over a single-wire digital protocol, formats the data as a JSON or MQTT payload, and pushes it to a cloud broker or HTTP endpoint. The dashboard then renders those values as gauges, line charts, or numerical widgets that update on a configurable interval.
The DHT22 (also labelled AM2302) offers a temperature accuracy of ±0.5 °C and a humidity accuracy of ±2–5% RH according to its manufacturer datasheet published by Sparkfun. That level of precision is sufficient for room monitoring, greenhouse tracking, server-room alerting, and academic lab submissions.
Why It Matters
Many engineering curricula now require students to submit a functioning IoT prototype as part of their final assessment. A temperature and humidity monitor with a live dashboard satisfies that requirement while remaining achievable in a single weekend. The hardware cost for the ESP32 and DHT22 combination is low enough that most students can self-fund the build, and the firmware can be written entirely in the Arduino IDE using free libraries — no commercial licences needed.
Key Benefits of Building This Temperature Monitor
Primary Advantages
Choosing to build an esp32 dht22 temperature dashboard rather than purchasing a commercial sensor unit gives you full control over data ownership, update frequency, alert thresholds, and the visual layout of the interface. The core advantages include:
- Zero recurring cost: Free MQTT brokers and dashboard platforms eliminate subscription fees that commercial monitoring services charge monthly.
- Customisable update intervals: Push readings every 5 seconds or every 10 minutes depending on your power budget and network constraints.
- Portable skills: The same firmware structure that drives this DHT22 project transfers directly to soil moisture monitoring, air quality tracking, or relay control — as demonstrated in the ESP32 smart irrigation system build guide.
- Offline capability: With minor firmware modifications, you can store readings on an SD card or internal flash when Wi-Fi is unavailable.
- Dashboard flexibility: You can choose from Grafana, Home Assistant, Node-RED, or purpose-built platforms depending on your skill level.
Who Benefits Most
Engineering and computer science students benefit from submitting a visually polished esp32 dht22 temperature dashboard as a project, since it demonstrates end-to-end IoT competency. Freelancers and independent developers can prototype a client-facing environmental monitor at near-zero cost before quoting for a larger deployment. Small greenhouse operators and home automation enthusiasts find that a DIY temperature and humidity monitor with a live chart is more reliable and configurable than most consumer smart-home sensors at the same price point. If you are already running relay-based home automation, you can extend that setup by following the ESP32 home automation relay control guide and adding sensor-triggered logic.
Step-by-Step: How to Build the ESP32 DHT22 Temperature Dashboard
Step-by-Step Overview
Follow these numbered steps in sequence. Each step builds directly on the previous one, so do not skip ahead.
Step 1 — Gather Your Components
Collect the following before writing a single line of code: one ESP32 development board (any 30-pin or 38-pin variant works), one DHT22 sensor module or bare sensor, one 10 kΩ pull-up resistor (if using the bare sensor rather than the breakout module), a breadboard, and three jumper wires. Install the Arduino IDE 2.x and add the ESP32 board package via the Boards Manager using the URL provided in Espressif’s official documentation.
Step 2 — Wire the DHT22 to the ESP32
Connect the DHT22 DATA pin to GPIO 4 on the ESP32. Connect VCC to the 3.3 V pin and GND to any ground pin. If you are using a bare four-pin DHT22 rather than a breakout module, place the 10 kΩ resistor between the DATA line and VCC. The breakout module has this resistor pre-soldered, so you can wire it directly with three connections. Verify all three connections before powering the board — reversed VCC and GND will permanently damage the sensor.
Step 3 — Install the Required Libraries
Open the Arduino IDE Library Manager and install two libraries: DHT sensor library by Adafruit, and Adafruit Unified Sensor. If you plan to push data via MQTT (the recommended approach for a live esp32 dht22 temperature dashboard), also install PubSubClient by Nick O’Leary. These three libraries are all available without cost directly from the Library Manager search panel.
Step 4 — Write and Upload the Firmware
Create a new sketch and paste the following core firmware. Replace the placeholder credentials with your own Wi-Fi SSID, password, and MQTT broker address before uploading.
#include <WiFi.h>
#include <PubSubClient.h>
#include <DHT.h>
#define DHTPIN 4
#define DHTTYPE DHT22
DHT dht(DHTPIN, DHTTYPE);
const char* ssid = “YOUR_SSID”;
const char* password = “YOUR_PASSWORD”;
const char* mqtt_server = “broker.hivemq.com”;
WiFiClient espClient;
PubSubClient client(espClient);
void setup() {
Serial.begin(115200);
dht.begin();
WiFi.begin(ssid, password);
while (WiFi.status() != WL_CONNECTED) delay(500);
client.setServer(mqtt_server, 1883);
}
void loop() {
if (!client.connected()) {
client.connect(“esp32_dht22_client”);
}
float temp = dht.readTemperature();
float hum = dht.readHumidity();
if (!isnan(temp) && !isnan(hum)) {
String payload = “{“temp”:” + String(temp) + “,”hum”:” + String(hum) + “}”;
client.publish(“sensor/dht22”, payload.c_str());
}
delay(10000);
}
Upload the sketch via USB. Open the Serial Monitor at 115200 baud to confirm the board connects to Wi-Fi and publishes readings every 10 seconds.
Step 5 — Configure Your Dashboard Platform
Subscribe to the topic sensor/dht22 on your chosen dashboard platform. For a straightforward free setup, Node-RED with its MQTT-in node works well; drag a gauge widget onto the canvas, configure it to parse the temp field from the JSON payload, and deploy. Alternatively, connect your esp32 dht22 temperature dashboard readings to a platform such as Nodik, which accepts MQTT payloads directly and lets you arrange gauge and graph widgets without writing dashboard code manually. Whichever platform you select, confirm that live readings appear before moving to step 6.
Step 6 — Test, Validate, and Share
Hold a warm object near the DHT22 and verify that the temperature reading on your dashboard rises within one or two polling cycles. Use an ice pack to test the lower range. Log at least 30 minutes of data to confirm stable readings without NaN errors. If you are submitting this as a project, review the ESP32 IoT project checklist to ensure your submission meets standard academic requirements before the deadline.
Tools and Resources You Need
The minimum toolset for this build is: Arduino IDE 2.x, a USB-A to Micro-USB or USB-C cable (depending on your ESP32 board variant), the three libraries listed in Step 3, and access to a free MQTT broker such as HiveMQ’s public broker or Mosquitto running locally. A multimeter is useful but not strictly required for this circuit.
Common Mistakes to Avoid
Mistake #1 — Reading the Sensor Too Frequently
The DHT22 requires a minimum sampling interval of 2 seconds between reads. Polling it faster than this causes the sensor to return NaN values, which then get published to your temperature and humidity dashboard as invalid data. Many beginners place dht.readTemperature() inside an unconstrained loop with no delay, then spend hours debugging what appears to be a firmware or wiring issue. Always enforce a minimum 2-second delay, and use a non-blocking timer (via millis()) rather than delay() in production code to keep the MQTT client loop alive.
Mistake #2 — Using an Unreliable Public MQTT Broker for Long-Term Deployments
Public brokers such as the HiveMQ public endpoint are suitable for testing but carry no uptime guarantees and impose message-size and rate limits. Deploying a permanent esp32 dht22 temperature dashboard against a public broker often results in data gaps during broker maintenance windows. For any deployment running longer than a few days, switch to a self-hosted Mosquitto instance or a free-tier account on a managed broker platform that offers authenticated connections.
How to Prevent Them
Structure your firmware defensively: check for NaN after every sensor read, implement a reconnect function that retries the MQTT connection with exponential back-off, and store the last valid reading in a variable so the dashboard does not display stale zeroes during brief disconnections. Apply a consistent variable naming convention from the start — tempC, humPct — to avoid confusion when extending the project to add additional sensors.
Tips for Getting the Best Results
Pro Tips
- Enclosure matters: The Adafruit community has documented 3D-printable ESP32 cases specifically designed to accommodate the DHT22 with a USB-C port cutout, which improves both sensor ventilation and cable management in permanent installations.
- Timestamp every reading: Instruct your firmware to append a Unix timestamp (obtained via NTP) to each MQTT payload so that your dashboard can plot accurate time-series charts even if the polling interval varies.
- Implement deep sleep for battery builds: If you power the board from a LiPo battery rather than USB, configure the ESP32 to wake, read, publish, and return to deep sleep in under three seconds. This can extend battery life from hours to weeks on a single charge.
- Calibrate against a reference: Compare your DHT22 output against a known-accurate thermometer for at least 15 minutes and apply a fixed offset in firmware if you observe a consistent deviation.
Advanced Techniques
Once your basic esp32 dht22 temperature dashboard is stable, consider adding a heat-index calculation using the formula already built into the Adafruit DHT library (dht.computeHeatIndex()). Publish the heat index as a third field in your JSON payload and add a separate gauge widget to the dashboard. For multi-room monitoring, assign a unique MQTT topic per device (e.g. sensor/room1/dht22, sensor/room2/dht22) and subscribe to all topics using the wildcard sensor/+/dht22 on the dashboard side. This pattern scales to dozens of nodes without firmware restructuring.
If you want to extend this build toward automated control — for example, triggering a fan relay when temperature exceeds a threshold — the architecture maps directly onto the relay control patterns described in the ESP32 home automation relay control guide. You can also explore push-alert integrations to receive notifications when readings breach defined limits, using the methods outlined in the ESP32 push notifications without Blynk guide — all without a paid subscription.
Frequently Asked Questions About ESP32 DHT22 Temperature Dashboards
Can I use a DHT11 instead of a DHT22?
Yes. Change DHTTYPE DHT22 to DHTTYPE DHT11 in the firmware. The DHT11 is cheaper but less accurate — it measures temperature to ±2 °C versus the DHT22’s ±0.5 °C — and it does not support sub-zero temperatures, which matters for cold-storage monitoring.
Which free dashboard platform is easiest to start with?
Node-RED with the Dashboard 2.0 module is widely used in academic settings because it runs locally and requires no account creation. For cloud-hosted options with a visual widget builder, review the curated comparison at the free IoT dashboard tools for ESP32 guide to match the platform to your specific requirements.
How do I secure my MQTT connection?
Use TLS-encrypted connections (port 8883) rather than plain TCP (port 1883), and authenticate with a username and password rather than an anonymous connection. The PubSubClient library supports TLS when combined with the WiFiClientSecure class available in the ESP32 Arduino core.
My dashboard shows NaN — what should I check first?
Check in this order: (1) confirm the DATA wire is connected to the correct GPIO pin, (2) verify the pull-up resistor is present if using a bare sensor, (3) ensure your polling interval is at least 2 seconds, and (4) confirm the sensor VCC is receiving 3.3 V rather than 5 V if your board routes 5 V through the VCC pin. Most NaN errors trace back to one of these four causes.
Can this project run on an ESP8266 instead?
The firmware is almost identical on an ESP8266 NodeMCU — replace #include <WiFi.h> with #include <ESP8266WiFi.h> and adjust the GPIO pin number to match your board’s pinout. The DHT22 sensor wiring and the MQTT logic remain unchanged, making this a direct skills transfer between the two platforms.
Ready to put this into practice? Try it free — no credit card required.
Start visualising your ESP32 sensor data for free with Nodik — connect your first device in minutes, no subscription required.
More in this series
- Best Free IoT Dashboard Tools for ESP32 (2026 Guide)
- ESP32 Push Notifications Without Blynk: 5 Ways to Stay Free
- ESP32 IoT Project Checklist Before Submission: The Complete Guide
- ESP32 Home Automation Relay Control From Phone: Complete Setup Guide
- ESP32 Smart Irrigation System for Agriculture: Step-by-Step Build Guide
- ESP32 GPS Tracker With Live Map: Build Your Own in 7 Steps
- ESP32 Water Level Monitor With Live Dashboard: A Real-World Case Study
- ESP32 Project Ideas for Final Year Students: 10 Builds That Actually Impress (2026)
Get new posts by email
Pick the topics you care about — we only email you when something new is published in them.