
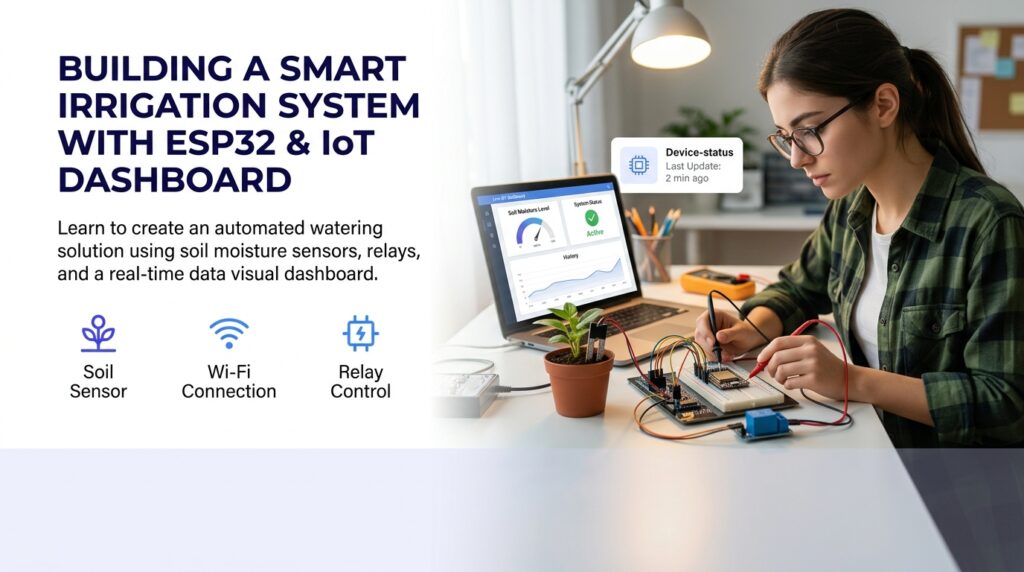
An ESP32 smart irrigation system for agriculture puts automated, data-driven watering in the hands of anyone with a microcontroller, a few sensors, and a Wi-Fi connection. Whether you manage a backyard garden or a small-scale farm plot, this guide walks you through every stage — from wiring your first soil moisture sensor to publishing live readings to a free cloud dashboard — without locking you into expensive subscription tiers.
What Is an ESP32 Smart Irrigation System for Agriculture
Definition and Background
An ESP32 smart irrigation system for agriculture is an embedded electronics setup where an ESP32 microcontroller reads soil moisture data, makes decisions based on programmable thresholds, and switches a water pump or solenoid valve on or off — automatically, without manual intervention. The ESP32 is a dual-core, Wi-Fi and Bluetooth enabled chip that costs roughly $5–$10 USD, making it one of the most affordable platforms for field-deployable IoT sensing. A wireless-sensor-network irrigation study published in Scientific Reports found roughly 15% lower water use than a conventional full-replacement irrigation schedule — a real, if more modest, demonstration of what sensor-driven watering can save over a fixed timer.
Why It Matters
Agriculture accounts for roughly 70% of global freshwater withdrawals. A precision irrigation system built around the ESP32 addresses this directly: sensors measure actual soil saturation rather than assumed schedules, so the pump runs only when crops genuinely need water. For students and hobbyists, an ESP32 smart irrigation system for agriculture also doubles as a capstone project that demonstrates real-world impact — soil science, embedded C++, MQTT messaging, and cloud dashboards all in one build.
Key Benefits of an ESP32 Smart Irrigation System for Agriculture
Primary Advantages
- Water conservation — The system waters only when soil moisture drops below your set threshold, eliminating over-irrigation.
- Remote monitoring — ESP32’s built-in Wi-Fi lets you stream sensor readings to a dashboard accessible from your phone or laptop.
- Low cost — Total hardware for an ESP32 smart irrigation setup typically runs under $30 USD (ESP32 board + capacitive moisture sensors + relay module + 12V pump).
- Scalability — Add multiple sensor zones by expanding to additional GPIO pins or chaining I2C multiplexers.
- No subscription lock-in — Use open-source broker and dashboard tools instead of paid cloud services.
Who Benefits Most
Engineering students gain a portfolio-ready IoT project. Small-scale farmers get affordable crop automation. Hobbyists with greenhouse setups replace manual watering with reliable sensor logic. The ESP32 smart irrigation system for agriculture is also well-suited for school or university lab environments where budget constraints make commercial PLC systems impractical.
How to Get Started: Step-by-Step Build Guide
Step-by-Step Overview
Step 1 — Gather Your Components
Collect the following hardware before writing a single line of code:
- ESP32 development board (ESP32-WROOM-32 or ESP32 DevKit V1)
- Capacitive soil moisture sensor (preferred over resistive — it resists corrosion)
- 5V single-channel relay module
- Small 12V submersible pump or solenoid valve
- 12V DC power supply + USB power for ESP32
- Jumper wires and a breadboard
Step 2 — Wire the Moisture Sensor and Relay
Connect the capacitive moisture sensor’s VCC pin to ESP32’s 3.3V output, GND to ground, and AOUT to GPIO34 (an ADC-capable pin). Wire the relay’s IN control pin to GPIO26, VCC to 5V (use a separate 5V rail if your board’s output is weak), and GND to common ground. Connect the pump through the relay’s NO (normally open) and COM terminals so the pump only runs when the relay energizes.
Step 3 — Install Arduino IDE Dependencies
Open Arduino IDE, go to File → Preferences, and add https://raw.githubusercontent.com/espressif/arduino-esp32/gh-pages/package_esp32_index.json to the Additional Boards Manager URLs. Then install the ESP32 board package via Boards Manager and add the PubSubClient library by Nick O’Leary for MQTT messaging. This is all free and open-source — refer to the official Espressif Arduino-ESP32 documentation for the latest installation steps.
Step 4 — Write the Firmware
Paste the following starter sketch into Arduino IDE. Adjust WIFI_SSID, WIFI_PASS, and your MQTT broker address before uploading.
#include <WiFi.h>
#include <PubSubClient.h>
const char* ssid = “YOUR_SSID”;
const char* password = “YOUR_PASS”;
const char* mqtt_server = “broker.hivemq.com”;
#define MOISTURE_PIN 34
#define RELAY_PIN 26
#define DRY_THRESHOLD 2500 // ADC value — calibrate for your soil
WiFiClient espClient;
PubSubClient client(espClient);
void setup() {
Serial.begin(115200);
pinMode(RELAY_PIN, OUTPUT);
digitalWrite(RELAY_PIN, HIGH); // relay OFF
WiFi.begin(ssid, password);
while (WiFi.status() != WL_CONNECTED) delay(500);
client.setServer(mqtt_server, 1883);
client.connect(“esp32-irrigation”);
}
void loop() {
int moisture = analogRead(MOISTURE_PIN);
String payload = String(moisture);
client.publish(“farm/soil/moisture”, payload.c_str());
if (moisture > DRY_THRESHOLD) {
digitalWrite(RELAY_PIN, LOW); // pump ON
client.publish(“farm/pump/status”, “ON”);
delay(5000);
digitalWrite(RELAY_PIN, HIGH); // pump OFF
}
delay(10000);
}
This sketch reads moisture every 10 seconds, publishes the value to an MQTT topic, and triggers the pump for 5 seconds whenever soil is too dry. Treat the 5-second burst and the 2500 ADC threshold as starting points — the right values depend on your pump’s flow rate and your soil type, so plan to tune both during calibration.
Step 5 — Choose a Free Dashboard
Subscribe to the MQTT topics using a free dashboard. Nodik is a strong choice for this project: it connects directly to your MQTT broker, displays soil moisture as a live gauge, and lets you add a pump status widget — all without a paid subscription. If you want a broader comparison of platforms for your ESP32 smart irrigation system for agriculture, read the Best Blynk Alternatives Free and Paid guide.
Step 6 — Calibrate the Moisture Sensor
Open Serial Monitor at 115200 baud. Record the ADC reading with the sensor held in dry air (your maximum dry value) and submerged in water (your minimum wet value). Update DRY_THRESHOLD in the sketch accordingly. Skipping calibration is the single biggest source of unreliable watering decisions in an ESP32 smart irrigation system for agriculture.
Step 7 — Deploy and Monitor Remotely
Upload the calibrated firmware, power the ESP32 from a USB power bank or 5V solar charger, and bury the sensor probe 5–8 cm into the root zone. Watch your dashboard for live moisture readings. For field deployments, enable deep sleep between readings to extend battery life — the ESP32 IoT Project Checklist Before Submission covers deep sleep configuration and power budgeting in detail.
Tools and Resources You Need
- Arduino IDE 2.x (free) or PlatformIO in VS Code
- HiveMQ public broker or a self-hosted Mosquitto instance
- MQTT Explorer desktop app for debugging topic payloads
- Multimeter for continuity checks on relay wiring
Common Mistakes to Avoid
Mistake #1 — Using Resistive Moisture Sensors
Resistive sensors use two bare metal probes that pass current through soil. They corrode within weeks outdoors, producing wildly inaccurate readings. Always use capacitive sensors in an ESP32 smart irrigation system for agriculture meant for real field conditions. The capacitive design measures dielectric permittivity rather than conductivity, so it survives continuous soil contact for months.
Mistake #2 — Sharing Ground Between High-Voltage Pump and ESP32
Running a 12V pump on the same ground line as your ESP32 without proper isolation can introduce voltage spikes that crash or permanently damage the microcontroller. Use the relay as a true electrical isolator: the pump circuit (12V) and the ESP32 circuit (3.3V/5V) should share only a common ground reference at a single point, ideally through the relay module’s optocoupler if present.
How to Prevent Them
Before powering the full system, use a multimeter to verify that the relay switches correctly with a low-power LED substituted for the pump. Only swap in the real pump once relay logic is confirmed. Equally, always calibrate your moisture sensor in the actual soil type you will deploy into — sandy loam, clay, and loam all produce different ADC baselines. Getting these fundamentals right saves hours of debugging once your esp32 smart irrigation system for agriculture is buried in a field.
Tips for Getting the Best Results
Pro Tips
- Average multiple readings — Sample the ADC 10 times in rapid succession and average the result to reduce noise. A single analogRead on the ESP32 can fluctuate by ±50 counts.
- Add a DHT22 temperature/humidity sensor — Evapotranspiration increases with temperature. Logging ambient conditions alongside soil moisture gives you richer data for optimizing watering schedules.
- Set a maximum pump runtime — Include a failsafe in firmware that cuts relay power after 30 seconds regardless of moisture reading, preventing flooding if the sensor fails.
- Use retained MQTT messages — Publish pump status with the
retainedflag so any dashboard connecting after a reboot immediately shows the last known state.
Advanced Techniques
Once your basic esp32 smart irrigation system for agriculture is running reliably, extend it with OTA (over-the-air) firmware updates so you can push threshold changes without physically retrieving the ESP32 from the field. The ESP32 Home Automation Relay Control From Phone guide shows how to add HTTP-based OTA to any relay project — the same pattern applies directly here.
For multi-zone deployments, assign each sensor a unique MQTT topic prefix (e.g., farm/zone1/moisture, farm/zone2/moisture) and manage all zones from a single dashboard panel. Multi-zone monitoring generally catches localized dry spots that a single sensor would miss entirely, which is the practical reason to plan for zone expansion from the start rather than an afterthought.
Frequently Asked Questions About ESP32 Smart Irrigation System for Agriculture
Can I run this system without internet access?
Yes. The ESP32 smart irrigation system for agriculture works entirely offline if you run a local Mosquitto MQTT broker on a Raspberry Pi. The pump automation logic runs on the ESP32 itself and does not require cloud connectivity to function.
How many moisture sensors can one ESP32 handle?
The ESP32 has up to 18 ADC channels, though only channels on ADC1 (GPIO32–GPIO39) are reliable when Wi-Fi is active. Realistically, plan for 4–6 capacitive sensors per board for a stable esp32 smart irrigation system for agriculture. Use an I2C ADC expander such as the ADS1115 if you need more channels.
What is the best free dashboard for this project?
For beginners, Nodik offers a clean MQTT-native interface with no widget limits on its free tier, making it a practical choice for visualizing soil moisture data from your esp32 smart irrigation system for agriculture. Grafana paired with InfluxDB is a powerful alternative if you prefer self-hosted time-series storage.
How do I prevent the ESP32 from resetting during pump activation?
Power the ESP32 from a dedicated USB supply or voltage regulator, completely separate from the pump’s 12V circuit. Inductive kick from the pump motor can cause voltage dips that trigger the ESP32’s brownout detector. A 100µF capacitor across the ESP32’s power input also helps buffer transient drops.
Is this suitable as a university project submission?
Absolutely — an esp32 smart irrigation system for agriculture covers multiple engineering competencies: embedded systems, networking protocols, sensor calibration, and data visualization. Before submission, run through the full ESP32 IoT Project Checklist to make sure your documentation, power analysis, and testing evidence meet academic standards.
Ready to put this into practice? Try it free — no credit card required.
Connect your ESP32 irrigation sensors to Nodik's free dashboard and monitor soil moisture, pump status, and alerts from anywhere — no subscription needed.
More in this series
- Best Free IoT Dashboard Tools for ESP32 (2026 Guide)
- ESP32 Push Notifications Without Blynk: 5 Ways to Stay Free
- ESP32 IoT Project Checklist Before Submission: The Complete Guide
- ESP32 Home Automation Relay Control From Phone: Complete Setup Guide
- ESP32 DHT22 Temperature Dashboard: Build Your Own in 6 Steps
- ESP32 GPS Tracker With Live Map: Build Your Own in 7 Steps
- ESP32 Water Level Monitor With Live Dashboard: A Real-World Case Study
- ESP32 Project Ideas for Final Year Students: 10 Builds That Actually Impress (2026)
Get new posts by email
Pick the topics you care about — we only email you when something new is published in them.